

SvgCraft turns a written idea or reference image into an editable SVG. You choose a visual style, generate the design, review the vector paths, and download the result from the browser.
This article explains that workflow and when an SVG is the right format.
What SvgCraft does
SvgCraft combines SVG generation and editing in one workspace. A project can begin with text, an uploaded PNG, JPG, or WebP image, or both.
Start in Projects. Describe the design or attach a reference image.
Choose a vector style. Select the style that matches the intended output.
Generate and review. Check the result as a design, not only as a preview image.
Edit and download. Open the SVG editor when paths or colors need adjustment, then export the finished file.
Choose a style for the final use
SvgCraft currently offers Vinyl, Flat, Outline, Silhouette, Engraving, Drawing, Linocut, and Cartoon styles. The useful choice depends on what you plan to make.
Vinyl and Silhouette favor bold shapes for cutting projects.
Outline and Drawing suit line-based artwork.
Engraving and Linocut add denser line detail.
Flat and Cartoon work well for clean illustrations.
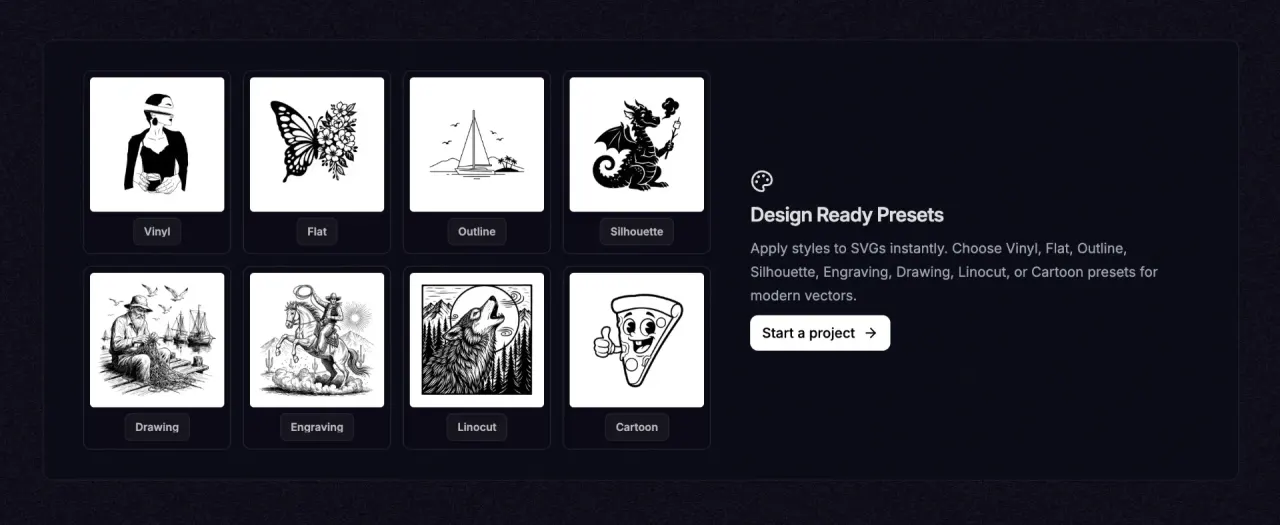
The eight vector styles available in SvgCraft.
Review the SVG before downloading
A generated result may contain a path you do not need, a color you want to change, or details that are too small for the final use. Open Edit SVG to inspect the actual objects and make focused changes.
The editor can also export PNG, JPG, and PDF, but keep the SVG when you need scalable paths or plan to continue editing the design.
When SVG is the right format
Use SVG when the design must scale without becoming pixelated or when another tool needs vector paths. Typical examples include cutting-machine files, laser artwork, logos, icons, signs, and print graphics.
Use a raster format such as PNG or JPG when the work depends on photographic color and texture rather than editable vector shapes.
Start with text or an image?
Use text when the design does not exist yet. This is the better route for a new badge, icon, label, decorative motif, or composition that you can describe clearly.
Use an image when you already have a visual reference. The upload can guide the subject, proportions, or overall structure. You can also combine an image with a short description when the reference should influence the result without being copied literally.
The input affects the first result, but the selected style controls how that idea is translated into vector artwork. A photo paired with Vinyl will be simplified differently from the same photo paired with Drawing or Engraving.
What to check after generation
First check the composition: is the subject clear, is the balance correct, and does the design still work at the size you need? Then inspect the vector structure.
Objects: Look for loose fragments or repeated shapes that add no value.
Colors: Make sure every color has a purpose, especially when the file will become separate production layers.
Open space: Check that important gaps have not closed and that the subject remains readable.
Final size: Zoom out. Fine details that look good on a large artboard can disappear in a small icon, decal, or engraving.
The editor is for focused corrections, not for rebuilding a weak result path by path. If the entire composition is wrong, change the input or style and generate again. If the structure is right but a few details are not, edit those details.
Common SvgCraft workflows
Create a new cut design from text
Describe the subject and composition, choose Vinyl or Silhouette, generate the SVG, remove unnecessary fragments, and keep the final shapes practical for the intended size.
Convert a reference image into vector artwork
Upload the image, choose the style that matches the output, and compare the generated design with the source. Preserve the main identity while removing detail that does not help the final use.
Prepare artwork for another application
Review the paths and colors in the editor, download the SVG, and import it into the cutting, engraving, design, or publishing software that will complete the project.
Questions before you download
Does the design remain clear at its real output size?
Does every visible color or object serve a purpose?
Do you need editable vector paths, or would a PNG or JPG be more suitable?
Can the next application interpret the layers the way you intend?
What the generated file actually contains
An SVG is not a flattened screenshot of the preview. It is a document made from vector objects: paths describe the shapes, fill and stroke values control their appearance, and the view box defines the drawing area. That structure is why the artwork can scale and why individual objects can be selected in an editor.
This also explains why two designs that look similar can behave differently later. One may contain a few clean shapes; another may contain many small fragments. The preview shows appearance, while the editor reveals the structure that another application will receive.
Generation and editing solve different problems
Generation is the right stage for composition, subject, style, and overall level of detail. If the result has the wrong pose, layout, or visual language, change the input or style and generate again. Rebuilding the entire composition one path at a time is slower and usually produces a less coherent file.
Editing is the right stage for focused corrections. Use it to remove a stray object, change a color, adjust a path, rename the project, or prepare the file for its next application. A good workflow accepts a strong generated structure and edits only what improves the final use.
Match the file to the next application
Before downloading, decide what will happen after SvgCraft. A cutting application needs practical shapes and intentional color layers. A laser workflow may benefit from line detail but still needs paths that remain readable at the engraved size. A logo or icon needs a clean silhouette and controlled colors. A print workflow may use SVG for scale, then export a raster copy for a specific platform.
The best-looking preview is not automatically the best production file. The correct result is the one whose objects, colors, and detail match the tool and material that come next.
A complete review checklist
Purpose: The design matches the job you intend to complete.
Composition: The subject and visual hierarchy remain clear at the final size.
Structure: There are no loose fragments or unnecessary duplicate objects.
Color: Every color is intentional and will behave as expected in the next application.
Format: SVG is the right export for the next step; otherwise choose PNG, JPG, or PDF.
Completing this review before download prevents most problems from being discovered only after the file reaches a cutter, engraver, or publishing tool.
Start a project
Choose the input that matches your task: describe a new design or upload an image you want to convert. Then select a style, review the result, and edit only what improves the final file.